Introduction
Have you ever dreamt of starting your own blog, sharing your passions with the world, and making some money along the way? You’re not alone. Blogging has become an incredibly popular way for people to express themselves, connect with others, and generate income. In this ultimate guide, we’ll walk you through the entire process of starting a profitable blog from scratch – step by step.
Whether you’re an aspiring writer, an entrepreneur looking to grow your business, or simply someone with a story to tell, blogging can be an enriching venture. But before you dive in, it’s essential to understand the basics and develop a solid foundation for success. That’s where this guide comes in. Follow along, and you’ll be well on your way to creating a blog that not only attracts readers but also generates income.

Step 1: Finding Your Niche
Choosing your niche is one of the most critical decisions you’ll make when starting a blog. Your niche is the specific topic or area of interest your blog will focus on. The right niche can make all the difference between a blog that thrives and one that struggles to gain traction. So how do you find the perfect niche for your blog? Let’s explore some essential considerations.
Assessing Your Interests and Passions
First and foremost, think about what you’re genuinely passionate about. After all, you’ll spend significant time researching, writing, and discussing your chosen topic, and you must enjoy it and have a deep interest in it. Make a list of your hobbies, interests, and expertise. What do you love to talk about? What topics can you speak on with authority?
Analyzing Market Demand and Competition
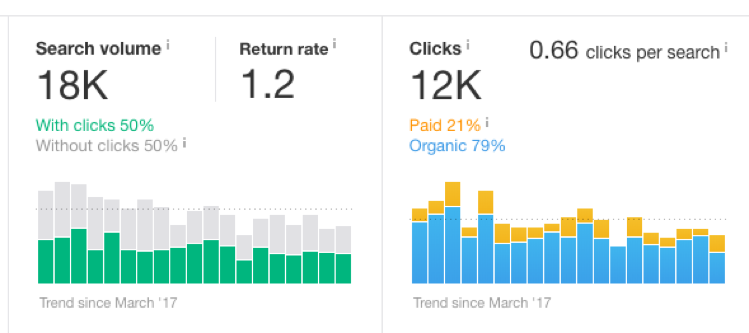
Once you’ve identified your passions, it’s time to determine if there’s an audience for your chosen niche. Ideally, you want a niche with high demand but low competition. Conduct keyword research using tools like Ubersuggest or Google’s Keyword Planner to gauge your chosen topics’ search volume and competition levels. Additionally, browse relevant forums, social media groups, and other online communities to get a sense of what people are discussing and the questions they’re asking.
Identifying Potential Monetization Opportunities
A profitable blog needs to have monetization potential. Examine your chosen niche and determine how you might make money from it. This could include affiliate marketing, sponsored content, selling products or services, or displaying ads. Look at other successful blogs in your niche and see how they generate income. This will give you an idea of the monetization opportunities available to you.
D. Balancing Personal Interests with Profitability
Ultimately, you’ll want to balance your personal interests and the niche’s profitability potential. Remember, it’s essential to be passionate about your niche, but it’s also crucial to ensure there’s an audience willing to consume your content and support your monetization efforts. Once you’ve found the sweet spot, you’ll have the foundation for a successful, profitable blog.
In the next section, we’ll discuss choosing the right blogging platform for your new blog. Stay tuned!
Step 2: Choosing a Blogging Platform
Now that you’ve nailed down your niche, it’s time to select the right blogging platform to bring your vision to life. A blogging platform is a software or service to create, publish, and manage your blog. With so many options available, it can be overwhelming to choose the right one. Don’t worry; we’re here to help! In this section, we’ll compare popular blogging platforms and explain why WordPress is the top choice for most bloggers.
Comparison of Popular Blogging Platforms
There are several blogging platforms to choose from, each with its own set of features and benefits. Some of the most popular options include:
- WordPress.org: A self-hosted, open-source platform that offers complete customization and control over your blog. It’s the most widely used platform, powering over 40% of all websites on the internet.
- Blogger: A free, hosted blogging platform owned by Google. It’s user-friendly and easy to set up, but customization options are limited compared to other platforms.
- Wix: A website builder and blogging platform known for its drag-and-drop functionality. It’s beginner-friendly, but the free version comes with limitations and ads.
- Squarespace: A user-friendly, all-in-one platform that includes web hosting, domain registration, and website-building tools. It’s known for its beautiful templates but comes with a monthly fee.
Pros and Cons of Each Platform
Each blogging platform has its own set of advantages and drawbacks. Here’s a quick overview:
- WordPress.org: Pros: Complete customization, a massive library of plugins and themes, great for SEO, and scalable. Cons: Requires self-hosting and a bit of a learning curve for beginners.
- Blogger: Pros: Easy to set up, free, and backed by Google’s infrastructure. Cons: Limited customization options, outdated design, and uncertain future due to Google’s history of shutting down services.
- Wix: Pros: Beginner-friendly, drag-and-drop functionality, and various templates. Cons: Limited free version, less SEO-friendly, and fewer plugins than WordPress.
- Squarespace: Pros: Beautiful templates, easy to use, and an all-in-one solution. Cons: Monthly fee, limited customization, and fewer plugins than WordPress.
Recommendations for Beginners: Why WordPress is the Best Option
After weighing the pros and cons of each platform, we highly recommend WordPress.org for most beginners. Here’s why:
- Customization: WordPress offers unparalleled customization options, allowing you to create a unique blog that stands out from the competition.
- Extensibility: With over 50,000 plugins and thousands of themes available, you can easily add new functionality and design elements to your blog without any coding knowledge.
- SEO-Friendliness: WordPress is built with SEO in mind, making it easier for your blog to rank high in search engine results.
- Scalability: As your blog grows, WordPress can easily accommodate your needs, whether you’re adding new features, increasing traffic, or even turning your blog into a full-fledged online store.
- Community Support: With its widespread use, WordPress has a massive community of users and developers that can help you troubleshoot issues, find solutions, and continually improve your blog.
WordPress offers the perfect combination of customization, functionality, and support, making it the ideal choice for bloggers looking to create a profitable blog.
The next section will guide you through selecting and registering a domain name for your new blog. Stay tuned!
Step 3: Picking and Registering a Domain Name
Your domain name is the web address (URL) where people will find your blog. It’s your online identity and your audience’s first impression of your brand. Choosing the right domain name is crucial for your blog’s success, so let’s dive into picking and registering the perfect domain name for your new blog.
Brainstorming Domain Name Ideas
- Keep it short and memorable: Aim for a domain name that’s easy to remember, type, and share. Shorter names are generally more memorable but don’t sacrifice clarity for brevity.
- Include keywords: If possible, include keywords relevant to your niche to improve SEO and clarify what your blog is about.
- Be unique and creative: Your domain name should reflect your brand’s personality and stand out. Think outside the box and consider wordplay, alliteration, or unexpected combinations.
- Avoid numbers and hyphens: Numbers and hyphens can be confusing and make your domain name harder to remember. Stick to letters for a cleaner and more professional look.
- Consider domain extensions: While the most popular domain extension is .com, other options are available, such as .net, .org, or niche-specific extensions like .travel or .blog. Choose the one that best fits your brand and audience.
Checking Domain Name Availability
Once you’ve brainstormed a list of potential domain names, you’ll need to check their availability. You can use domain name registrars like Namecheap, GoDaddy, or Google Domains to search for your desired domain name and see if it’s available for registration.
Registering Your Domain Name
After you’ve found the perfect available domain name, it’s time to register it. Here’s how:
- Choose a domain registrar: Select a reputable domain registrar like Namecheap, GoDaddy, or Google Domains to register your domain name.
- Create an account: You’ll need to create an account with your chosen domain registrar, which will allow you to manage your domain and associated services.
- Register your domain: Follow the registrar’s instructions to register your chosen domain name. You’ll need to provide your contact information and select the registration period (usually one year, with the option to renew).
- Pay the registration fee: Domain registration fees vary depending on the registrar and domain extension. Most .com domains cost around $10-$15 per year.
- Set up domain privacy: Domain privacy (WHOIS privacy) protects your personal information from publicly appearing in the domain registration database. Many registrars offer domain privacy for free or for a small additional fee.
Congratulations! You’ve now secured your domain name and are one step closer to launching your profitable blog. In the next section, we’ll cover web hosting and how to set up your WordPress blog. Stay tuned!
Step 4: Setting up Web Hosting
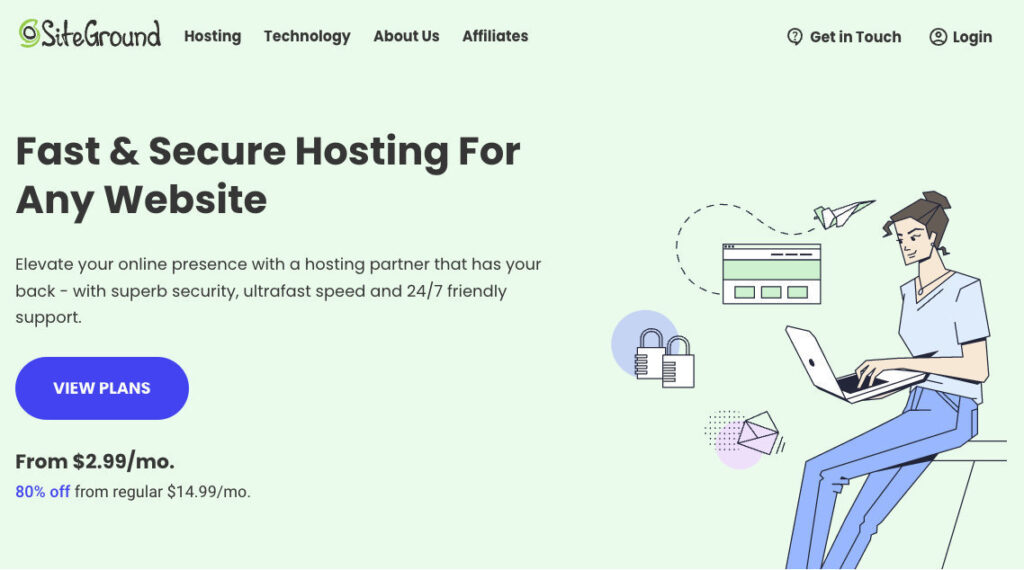
Web hosting is the service that stores your blog’s files and makes them accessible to visitors over the internet. Selecting a reliable web hosting provider is crucial for your blog’s performance, security, and growth. In this section, we’ll walk you through setting up web hosting for your new blog, and I highly recommend SiteGround as your hosting provider.
Why Choose SiteGround?
- Excellent performance: SiteGround offers lightning-fast load times and reliable uptime, ensuring your visitors’ smooth and enjoyable browsing experience.
- WordPress compatibility: SiteGround is officially recommended by WordPress.org, and their hosting plans come with WordPress pre-installed for easy setup.
- Top-notch customer support: SiteGround’s knowledgeable support team is available 24/7 to assist with any questions or issues.
- Scalable plans: As your blog grows, you can easily upgrade your hosting plan to accommodate increased traffic and resource needs.
- Free features: SiteGround includes free SSL certificates for secure browsing, daily backups for peace of mind, and a CDN (Content Delivery Network) for faster global load times.
Signing Up for SiteGround Hosting
- Visit SiteGround’s website: Go to SiteGround.com and click on “Web Hosting” in the main menu to view their hosting plans.
- Choose a hosting plan: SiteGround offers three hosting plans tailored to different needs. The StartUp plan should suffice for new bloggers, with the option to upgrade later as your blog grows.
- Select your domain: You’ll be prompted to enter your previously registered domain name or register a new one through SiteGround.
- Complete the registration process: Fill in your personal information, billing details, and choose your hosting plan duration (12, 24, or 36 months). SiteGround offers a 30-day money-back guarantee, so you can try their services risk-free.
- Check your email: After completing the registration process, you’ll receive a confirmation email with important account details and instructions for setting up your WordPress blog.
Installing WordPress on SiteGround
- Log in to SiteGround: Access your SiteGround Customer Area using the login credentials provided in the confirmation email.
- Set up your site: Navigate to the “Websites” tab and click “New Website” to start the site setup wizard.
- Choose WordPress: Select “WordPress” as your website software, and enter your desired WordPress login credentials.
- Complete the installation: Follow the on-screen instructions to complete the WordPress installation. SiteGround will automatically configure your domain, SSL certificate, and other essential settings.
Congratulations! You’ve successfully set up web hosting and installed WordPress on your blog. The next section will dive into customizing your blog’s design and functionality with themes and plugins. Keep reading!

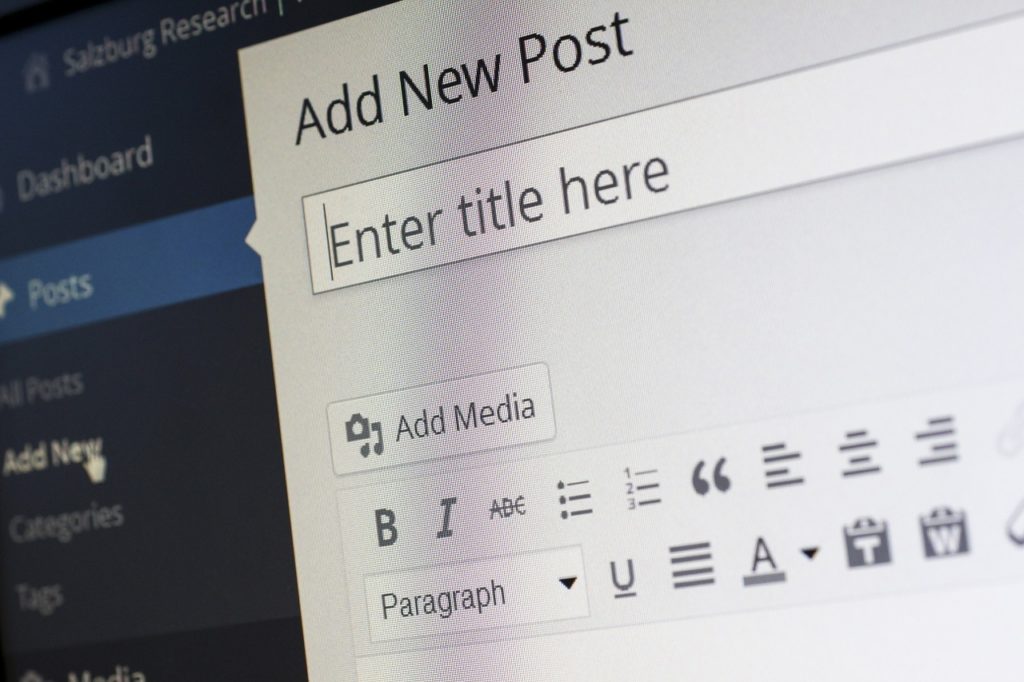
Step 5: Installing and Configuring Your Blog
Now that you’ve set up your web hosting and installed WordPress, it’s time to dive into the exciting process of customizing your blog’s appearance and functionality. In this step, we’ll explore how to choose and install a WordPress theme and essential plugins that will enhance your blog’s performance and user experience.
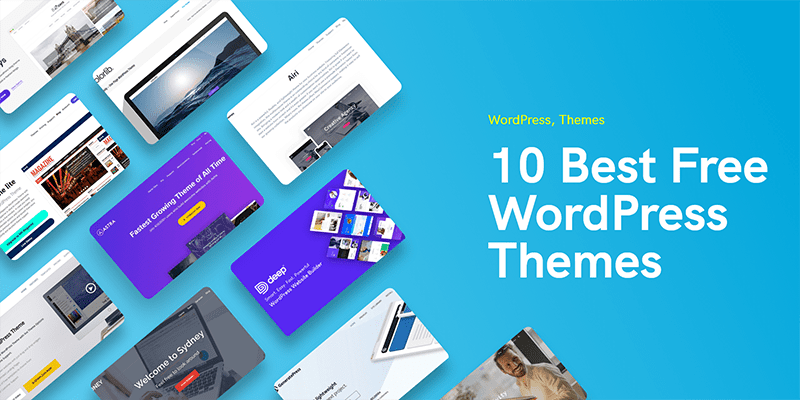
Choosing and Installing a WordPress Theme
Your blog’s theme determines its overall design, layout, and visual style. With thousands of free and premium WordPress themes available, choosing one that aligns with your niche, branding, and desired user experience is essential. Here are some tips to help you select the perfect theme for your blog:
- Prioritize simplicity and user experience: Look for a clean, easy-to-navigate design that won’t overwhelm your readers with excessive features or clutter.
- Make sure it’s mobile-friendly: With most of the web traffic coming from mobile devices, choosing a responsive theme that looks and performs well on all screen sizes is crucial.
- Check for compatibility and updates: Ensure the theme is compatible with the latest version of WordPress and receives regular updates from its developer to maintain security and functionality.
To install a new WordPress theme, follow these steps:
- Log in to your WordPress dashboard: Access your WordPress admin area by entering yourdomain.com/wp-admin and logging in with your username and password.
- Navigate to the themes section: In the left-hand menu, hover over “Appearance” and click “Themes.”
- Add a new theme: Click the “Add New” button at the top of the page to browse the theme directory. Use the search bar, category filters, or popular tags to find a theme that suits your needs.
- Preview and install your chosen theme: Hover over your desired theme and click “Preview” for a live demo. If you’re happy with your choice, click “Install” to add the theme to your blog. Once installed, click “Activate” to apply the theme to your site.
Installing Essential WordPress Plugins
Plugins are tools that extend your blog’s functionality, offering features like SEO optimization, social sharing, and contact forms. While installing numerous plugins is tempting, it’s important to be selective and prioritize those that truly benefit your blog. Here are five essential plugins for any new blogger:
- Yoast SEO: This powerful plugin helps optimize your blog for search engines, guiding you through keyword placement, meta descriptions, and other on-page SEO best practices.
- WP Rocket: Speed up your blog and improve user experience with this caching plugin, which reduces load times and optimizes your site’s performance.
- Akismet Anti-Spam: Protect your blog from spam comments with this essential plugin, which automatically filters and blocks spammy content.
- Social Warfare: Encourage social sharing and increase your blog’s visibility with this customizable social sharing plugin, which makes it easy for readers to share your content on various platforms.
- Contact Form 7: Allow readers to contact you through a professional-looking contact form, easily set up and customized using this popular plugin.
To install a plugin, follow these steps:
- Log in to your WordPress dashboard and navigate to the plugins section: In the left-hand menu, hover over “Plugins” and click “Add New.”
- Search for your desired plugin: Use the search bar to find the plugin you want to install.
- Install and activate the plugin: Click “Install Now” to add the plugin to your blog. Once installed, click “Activate” to enable its functionality.
Configure the plugin settings: Most plugins have a settings page where you can customize their features and functionality. Review and configure each plugin’s settings to ensure it performs optimally on your blog.
Customizing Your Blog’s Design and Layout
With your theme and essential plugins installed, it’s time to personalize your blog’s appearance and create a unique, visually appealing experience for your readers. Here’s how to customize your blog’s design and layout:
- Customize your theme: Navigate to “Appearance” > “Customize” in your WordPress dashboard to access the theme customizer. You can change your blog’s title and tagline, colors, typography, header and footer options, and other design elements here.
- Create a custom menu: Organize your blog’s navigation by creating a custom menu. Go to “Appearance” > “Menus” and click “Create a new menu.” Add pages, categories, or custom links to your menu, then drag and drop to reorder them. Finally, assign your menu to a location (e.g., primary or secondary menu) and click “Save Menu.”
- Add widgets to your sidebar or footer: Widgets are blocks of content or functionality you can add to your blog’s sidebar or footer. Go to “Appearance” > “Widgets” to view the available widget options. Drag and drop your desired widgets into the designated areas and customize their settings as needed.
Setting Up Permalinks for SEO-friendly URLs
Permalinks are the permanent URLs of your blog posts and pages. WordPress uses a numeric structure for permalinks by default, which isn’t ideal for SEO. To create SEO-friendly URLs, follow these steps:
- Go to “Settings” > “Permalinks” in your WordPress dashboard.
- Select the “Post name” option under “Common Settings.”
- Click “Save Changes” to update your permalink structure.
This will make your blog’s URLs more descriptive and easier for search engines to understand, helping to boost your search rankings.
Following these instructions, you’ll have a fully customized, visually appealing blog ready to create and share engaging content. Remember to craft your blog posts focusing on valuable, actionable information that is relatable and engaging. This approach will help you build a loyal and satisfied audience. Keep learning and growing as a blogger, and you’ll be on your way to success. Happy blogging!

Step 6: Creating Essential Pages and Navigation
To provide a comprehensive and user-friendly experience for your readers, creating a few key pages on your blog and setting up easy-to-navigate menus is crucial. In this step, we’ll walk you through creating the essential pages and organizing your blog’s navigation.
Essential Pages for Your Blog
- About Page: An About page is your chance to introduce yourself and your blog to your audience. Share your story, your expertise, and the purpose behind your blog. This personal connection can help you build trust and rapport with your readers.
- Contact Page: A Contact page makes it easy for your readers, potential partners, or advertisers to contact you. Include a contact form, email address, and links to your social media profiles.
- Privacy Policy & Disclaimer: A Privacy Policy is a legal document that outlines how your blog collects, uses, and stores user data. A Disclaimer clarifies your responsibilities as a blogger and discloses any affiliate relationships. These pages are crucial for transparency and legal compliance.
- Start Here or Resources Page: A Start Here or Resources page is an excellent way to guide new readers to your most valuable content, helping them quickly find the information they seek. Curate a list of your best posts, resources, or tools related to your niche.
Setting Up Your Blog’s Navigation
Organize your blog’s navigation by creating custom menus that direct readers to your most important pages and content categories. Here’s how to create a custom menu in WordPress:
- Go to “Appearance” > “Menus” in your WordPress dashboard.
- Click “Create a new menu,” give it a name, and click “Create Menu.”
- You can add pages, categories, or custom links to your menu on the left side. Check the items you want to include and click “Add to Menu.”
- Arrange the menu items by dragging and dropping them into the desired order.
- Assign your menu to a location, such as the primary or secondary menu, and click “Save Menu.”
Creating essential pages and setting up clear, user-friendly navigation will enhance your readers’ experience and increase the likelihood that they’ll return to your blog. Keep your content engaging, valuable, and focused on your audience’s needs as you grow your blog and build a loyal following.
Step 7: Crafting High-Quality Content
Content is the backbone of your blog, and creating high-quality, engaging content is crucial for attracting readers and keeping them coming back for more. In this step, we’ll discuss understanding your target audience, creating valuable content, and developing a content strategy with a consistent posting schedule.
Understanding Your Target Audience
- Create reader personas: Develop a clear understanding of your target audience by creating reader personas. Consider their demographics, interests, pain points, and challenges related to your niche. This will help you tailor your content to their needs and preferences.
- Monitor audience engagement: Keep track of which blog posts and topics resonate most with your audience by monitoring comments, social shares, and analytics data. Use this information to refine your content strategy and focus on what truly engages your readers.
- Conduct surveys and polls: Gather feedback from your readers through surveys or polls to better understand their preferences and needs. This direct input can help you create content that truly resonates with your audience.
Tips for Creating Engaging, Valuable, and Shareable Content
- Write compelling headlines: Your headline is the first thing readers see, and it can make or break their decision to click and read your post. Craft headlines that are attention-grabbing, curiosity-provoking, and promise value to the reader.
- Use storytelling: Incorporate storytelling elements into your content to connect with your audience on a deeper level. Share personal experiences, anecdotes, or case studies to make your content more relatable and engaging.
- Break up long paragraphs: Make your content easy to read by breaking up long paragraphs into shorter, more digestible sections. Use headings, subheadings, lists, and images to create a visually appealing and scannable layout.
- Include visuals: Enhance your content with visuals, such as images, infographics, or videos. Visuals can help illustrate your points, break up text-heavy sections, and make your content more shareable on social media.
- Optimize for SEO: Increase your content’s visibility in search engine results by incorporating relevant keywords, using descriptive URLs, and optimizing your images with alt tags. This will help attract organic traffic to your blog.
Developing a Content Strategy and Posting Schedule
- Define your content pillars: Identify the main themes or topics your blog will cover. These content pillars should align with your niche and your target audience’s interests, providing a clear focus for your content creation efforts.
- Research popular and trending topics: Stay up-to-date with popular and trending topics within your niche. Use tools like Google Trends, BuzzSumo, or social media platforms to find inspiration for timely and relevant content.
- Plan your content calendar: Create a content calendar that outlines your upcoming blog posts, including their titles, keywords, and publishing dates. This will help you maintain a consistent posting schedule and ensure your content remains fresh and relevant.
- Balance evergreen and timely content: Include both evergreen contents that remain relevant over time and timely content that addresses current trends or events. This mix will help you attract a diverse audience and maintain their interest in your blog.
By understanding your target audience, crafting engaging and valuable content, and developing a strategic content plan, you’ll be well on your way to building a loyal readership and growing your blog’s success. Keep refining your content strategy as you learn more about your audience and the ever-changing landscape of your niche.
Step 8: Implementing SEO Best Practices
Search engine optimization (SEO) is essential for increasing your blog’s visibility in search engine results and driving organic traffic to your site. This step will cover the basics of on-page and off-page SEO, keyword research and optimization, SEO-friendly content, and effective link-building strategies.
Basics of On-Page and Off-Page SEO
On-page SEO refers to optimizing individual blog posts and pages on your website for search engines. This includes keyword usage, title tags, meta descriptions, headings, URL structure, and image alt tags. To improve your on-page SEO, ensure that your content is well-structured and easy to read, and include relevant keywords in strategic locations throughout your post.
Off-page SEO focuses on factors outside your website that can influence your search engines rankings, such as backlinks from other websites, social media activity, and online reputation. To improve your off-page SEO, engage in link-building activities, create shareable content, and foster relationships with influencers in your niche.
Keyword Research and Optimization
Keyword research is identifying and targeting relevant search terms that your target audience uses in search engines. Use tools like Google’s Keyword Planner, Ubersuggest, or SEMrush to find keywords related to your niche and assess their search volume, competition, and relevance.
Optimize your content by including your target keywords in your title tags, meta descriptions, headings, and throughout your blog post. Be careful not to overuse keywords, which can lead to keyword stuffing and negatively impact your SEO.
Creating SEO-Friendly Content
To create SEO-friendly content, focus on writing high-quality, engaging, and valuable content that addresses your target audience’s needs and preferences.
In addition to incorporating relevant keywords, ensure your content is well-structured, using headings, subheadings, lists, and images to create a visually appealing and easy-to-read layout. Write in-depth and comprehensive articles that cover your topic thoroughly, as search engines often prioritize longer, more informative content. Lastly, include internal links within your blog posts to guide readers to related content on your site and external links to authoritative sources to support your claims and enhance your credibility.
Link-Building Strategies
Link-building is acquiring backlinks from other websites, which can help improve your blog’s search engine rankings and credibility. Some effective link-building strategies include:
- Creating high-quality, shareable content that others naturally want to link to.
- Guest posting on reputable websites within your niche, with a link back to your site in your author bio.
- Reach out to influencers and bloggers in your niche for collaborations or to share your content.
- Engaging in relevant forums, communities, and social media platforms to share your expertise and content.
- Conducting outreach to websites linked to similar content suggests they might also find your content valuable and worth linking to.
Implementing SEO best practices will improve your blog’s visibility in search engine results, attract more organic traffic, and grow your online presence. Remember, SEO is an ongoing process, so continually refine your strategies and stay informed about industry trends and best practices.

Step 9: Promoting Your Blog
Creating high-quality content is only half the battle – you also need to promote your blog effectively to reach your target audience and grow your readership. In this step, we’ll explore strategies for promoting your blog, including utilizing social media platforms, networking with other bloggers and influencers, guest posting and content partnerships, and email marketing.
Utilizing Social Media Platforms for Promotion
Social media platforms are invaluable for promoting your blog, allowing you to reach a large audience and engage with potential readers. To make the most of each platform, consider the following tips:
- Share your blog posts on platforms like Facebook, Twitter, Instagram, Pinterest, and LinkedIn, tailoring your messaging to each platform’s unique audience and format.
- Use eye-catching images and attention-grabbing headlines to encourage clicks and shares.
- Engage with your followers by responding to comments and messages, and participate in relevant groups and discussions to showcase your expertise and drive traffic to your blog.
- Use hashtags strategically to increase your content’s visibility and reach a larger audience.
Networking with Other Bloggers and Influencers
Building relationships with other bloggers and influencers in your niche can help expand your reach and credibility. To effectively network, consider these strategies:
- Connect with like-minded individuals through social media, blog comments, and industry events.
- Offer support and share their content, as this can lead to reciprocation and strengthen relationships.
- Collaborate on projects, such as webinars, podcasts, or joint blog posts, to establish mutually beneficial relationships.
- Attend industry conferences and events to meet influencers in person and build lasting connections.
Guest Posting and Content Partnerships
Guest posting and content partnerships can help you gain exposure, build backlinks, and establish yourself as an authority in your field. To succeed with guest posting, follow these guidelines:
- Research reputable websites in your niche and identify opportunities for guest posting.
- Pitch unique, high-quality content ideas that align with their audience’s interests and address current gaps in their content.
- Include a relevant, non-promotional author bio with a link back to your blog.
- Promote your guest posts on your own blog and social media channels to drive traffic and increase visibility.
For successful content partnerships, consider these tips:
- Identify influencers or bloggers with complementary skills or expertise and propose collaborative projects.
- Co-author articles, create joint research projects, or develop shared resources that benefit both audiences.
- Cross-promote each other’s content and share your collaborative work on your respective platforms.
Email Marketing Strategies
Email marketing is a powerful tool for promoting your blog and nurturing relationships with your readers. To effectively use email marketing, follow these best practices:
- Build an email list by offering a lead magnet, such as a free eBook, checklist, or exclusive content, in exchange for your visitor’s email addresses.
- Use an email marketing platform like Mailchimp or ConvertKit to send regular newsletters, share new blog posts, and offer valuable resources and insights.
- Personalize your emails and segment your list to target specific audience segments and increase engagement.
- Include clear calls to action in your emails to encourage readers to visit your blog, share your content, or leave comments.
By implementing these promotion strategies, you’ll raise awareness of your blog, attract new readers, and strengthen your relationships with your existing audience. Remember, promotion is an ongoing process, so continually refine your strategies and explore new channels to expand your reach and grow your blog’s success.
Conclusion
As we wrap up this comprehensive guide, let’s quickly recap the steps you’ve learned to start a profitable blog:
- Finding your niche
- Choosing a blogging platform
- Selecting a domain name
- Setting up web hosting
- Installing and configuring your blog
- Creating essential pages and navigation
- Crafting high-quality content
- Implementing SEO best practices
- Promoting your blog
- Monetizing your blog
Starting a blog can be an exciting and rewarding journey, but it’s essential to remember that success won’t happen overnight. It takes time, dedication, and perseverance to build a thriving blog that generates income. Keep learning, experimenting, and refining your strategies, and most importantly, enjoy the process. As you grow your blog and engage with your readers, you’ll gain invaluable insights and experiences that will make you a better blogger.
Lastly, don’t forget that you’re not alone on this journey. Becoming part of a community of like-minded bloggers can provide invaluable support, motivation, and learning opportunities. We invite you to join our community at BloggerTips.com, where you’ll find a wealth of resources, tips, and advice to help you build a successful blog.
Subscribe to our newsletter to stay updated on the latest blogging trends, strategies, and opportunities. As a subscriber, you’ll also receive exclusive access to our upcoming blogging courses, webinars, and more. We’re excited to be part of your blogging journey and look forward to seeing your progress. Here’s to your blogging success!